Treatment (optional)
Under this menu item you will find everything concerning cheese treatment and treatment robots.
Robot Status
All robots are listed here.

The following information is available for each robot:
| Information | Description |
|---|---|
| Name | The name of the robot |
| Connection | Connected (green) or not connected (red) |
| Operating Status | Stopped, running, error |
| Report Type | Local, report only, remote |
| Program | Putaway, treatment, retrieval from storage |
| Cellar | Current cellar |
| Row | Current row |
| Column | Current column |
Robot Jobs
This lists the jobs that the robot is to carry out.
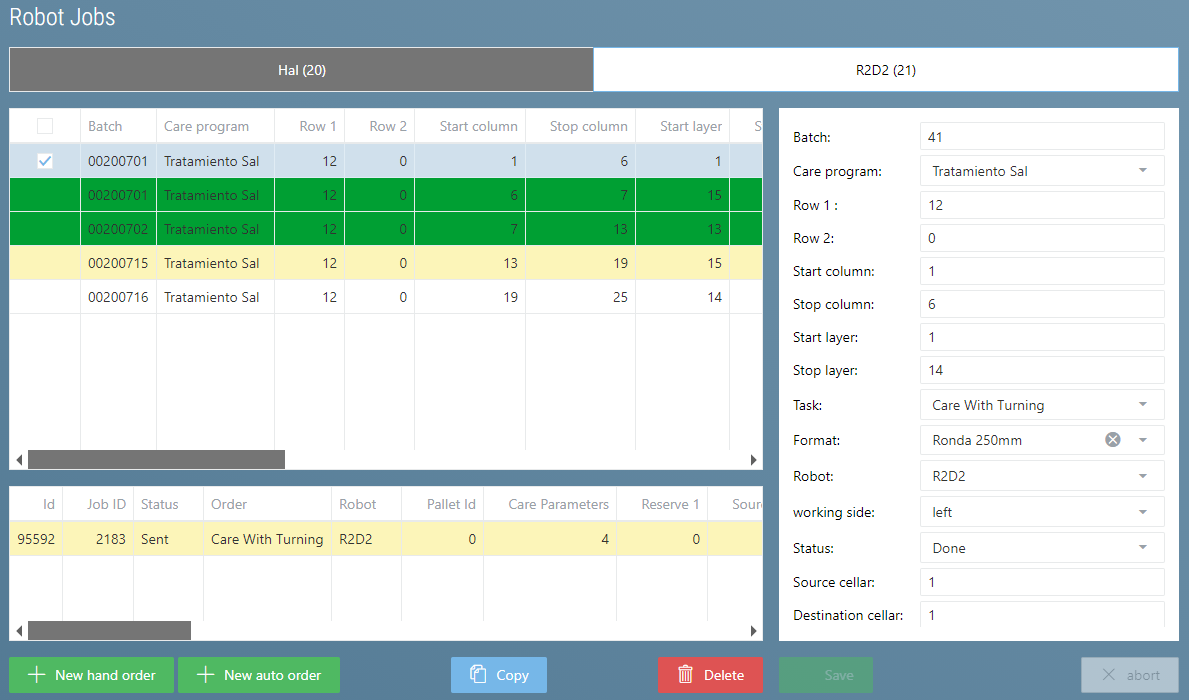
This view is divided into four parts.
- At the top there is a tab for each robot, so you can switch back and forth between the robot jobs.
- The job list takes up the largest part. It contains all the jobs that have been assigned to the robot.
The color indicates the respective status:
- Orange: The job was canceled.
- Dark green: The job has been completed.
- Red: An error occurred during the job
- Yellow: The job was sent to the robot
- The job buffer list is located below. It contains the buffer entries that are created for each job. The job is not completed until all buffer entries have been completed.
- From each treatment job we get exactly one buffer entry
- For storage jobs, a buffer entry is created for each board on the pallet.
- The job editing view is located on the right. Here you can create a new job or modify an existing one, depending on your user rights.
New Auto Job
In addition to the buttons known from Tables there is the 'New Auto Job'  button.
If you click on this button, the Create Treatment Job popup appears
button.
If you click on this button, the Create Treatment Job popup appears

Jobs Settings
The following settings can be made:
| Name | Description |
|---|---|
| Robot | Which robot should be used |
| Cellar | In which cellar |
| Start | Start Position |
| Stop | Stop Position |
| Tier Limit | Maximum and minimum tier |
| Job |
|
| Return |
|
| Move After Job Completion (optional) | Where should the robot move to after all newly generated jobs are finished:
|
| Sorting (optional) | How the jobs are sorted:
|
Click Ok to create the jobs.
Treatment Recommendations
The system displays the batches and their corresponding treatment values based on the treatment plans or treatment parameter-age assignments. The system will only display recommendations from which no orders have yet been made.
The recommendations are displayed by cellar. Additionally, each individual row can be selected or deselected.
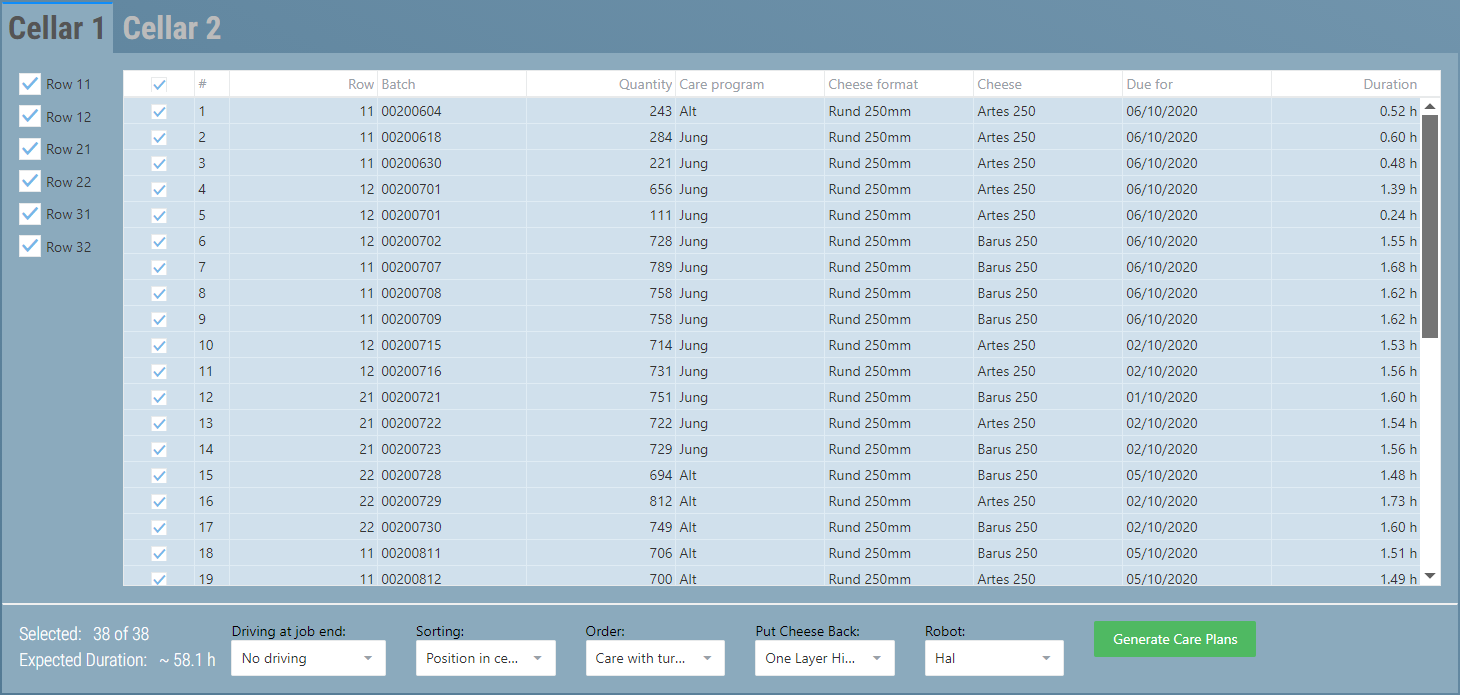
This shows the batch in question, since when the treatment is due, and an estimate is made how long this treatment will take, based on the robot's speed.
Once you have selected the desired recommendations you can still make various adjustments.

These correspond exactly to the settings from the [Robot Jobs].(xref:PflegenUID#aufträge-einstellungen)
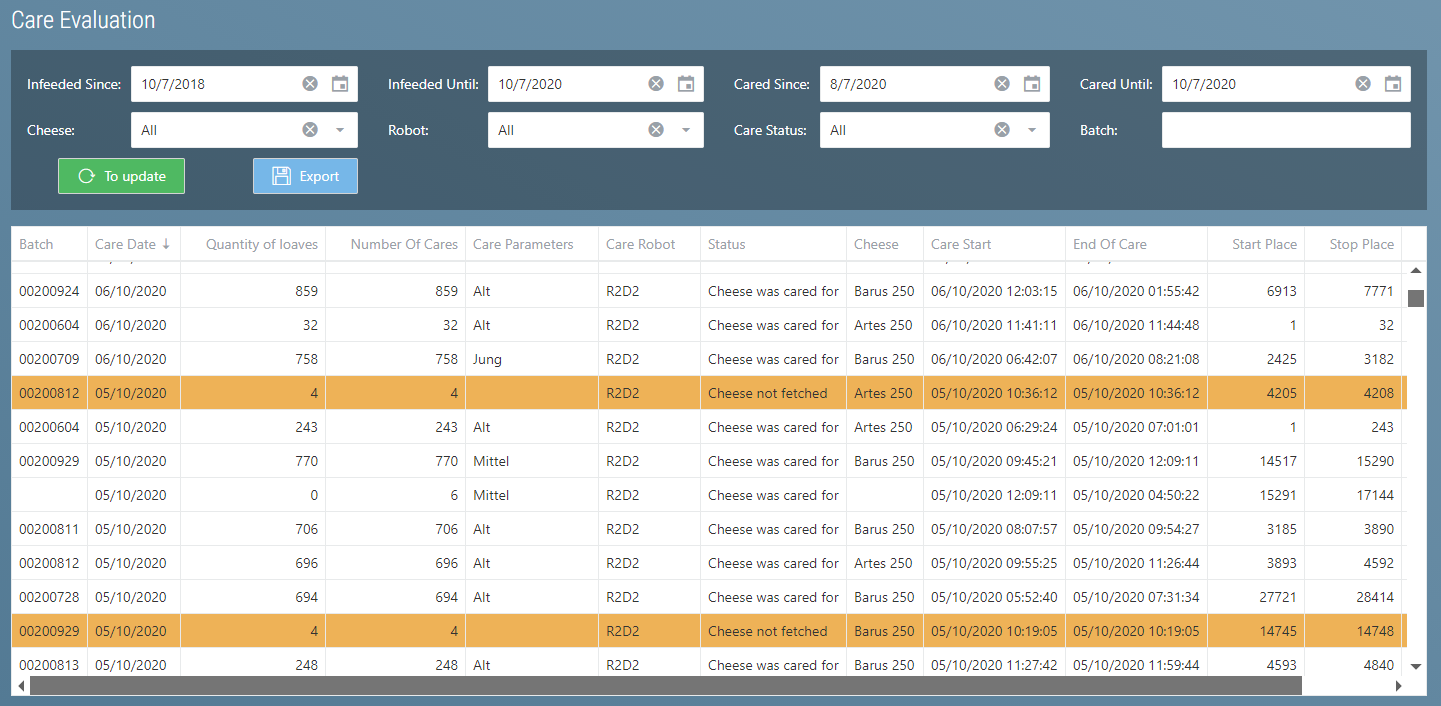
Treatment Evaluation
Past treatment processes are displayed here. Various filters allow you to filter the data
Treatment Parameters
Treatment parameters can be created here.
Each set of treatment parameters consists of a name and various parameters that determine how the robot performs the treatment. These correspond to the parameters known from the treatment robots.
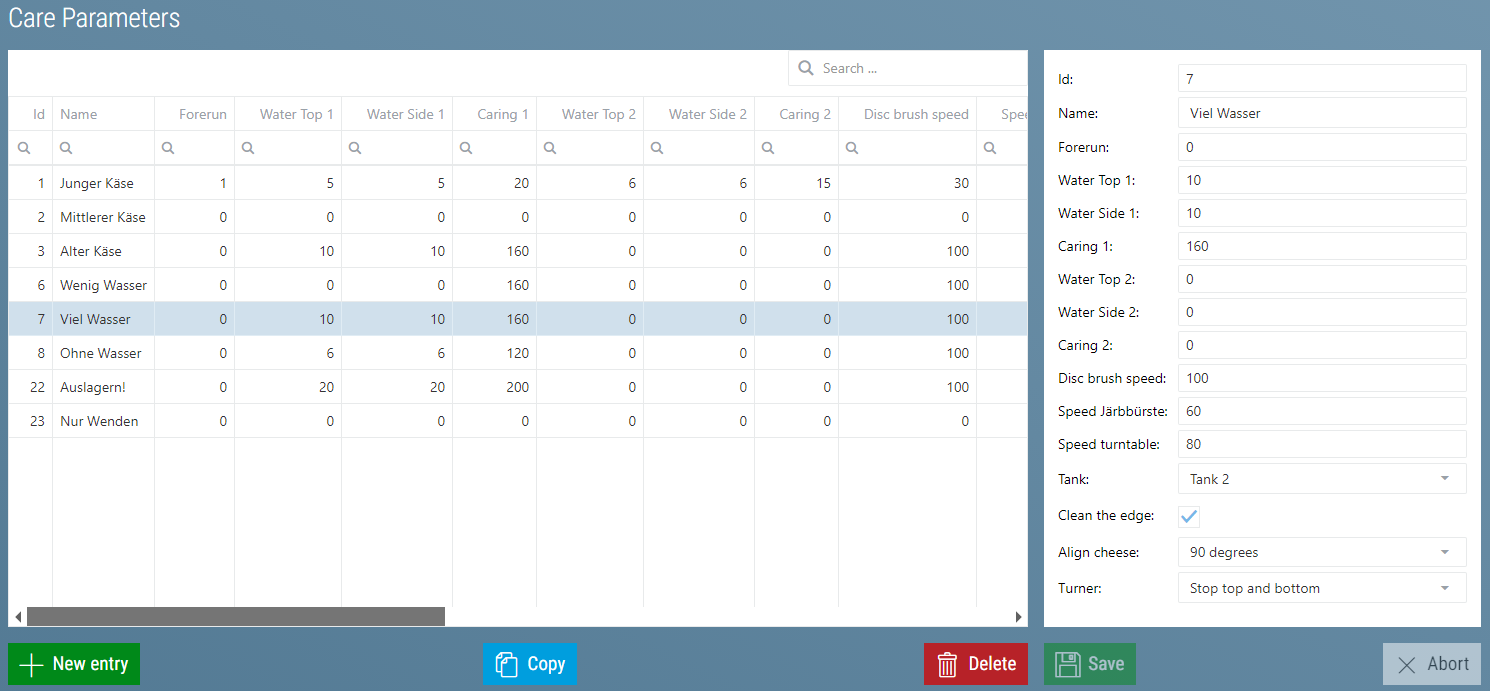
According to the configuration (depending on the robot used) the following columns are possible:
| Parameters | Description |
|---|---|
| Water: Advance [0.1 sec] | As soon as the brushes are in position, the advance is started. |
| Water: Top 1 [0.1 sec] | During this time the pump is switched on and water is added on the surface. |
| Water: Side 1 [0.1 sec] | During this time the pump is switched on and water is added on the side. |
| Water: Treatment 1 [0,1 sec] | The brushes and the cheese rotate. No more water is added. When the time is up, the treatment process is complete. |
| Water: Top 2 [0.1 sec] | During this time the pump is switched on and water is added on the surface. |
| Water: Page 2 [0,1 sec] | During this time the pump is switched on and water is added on the side. |
| Water: Treatment 2 [0,1 sec] | The brushes and the cheese rotate . No more water is added. When the time is up, the treatment process is complete. |
| Rotation Surface Brush [%] | Enter the speed for the surface brushes. Possible input: 10% - 100% |
| Rotation Side Brush [%] | Enter the speed for the side brushes. Possible input: 10% - 100% (Option) |
| Rotation of Rotary Table [%] | Enter the speed for the rotary table. Possible input: 10% - 100%. For square cheese, the speed is limited. |
| Pressure Disc Brush | Pressure of the brushes on the cheese; possible input: 1 (lowest pressure) - 10 (highest pressure) |
| Pressure Side Brush | Pressure of the brushes on the cheese; possible inputs: 1 (lowest pressure) - 10 (highest pressure) |
| Disc Brush | Use disc brush or not.
|
| Side Brush | Use side brush or not.
|
| Sense of Rotation Brushes | The sense of rotation of the brushes
|
| Salt |
|
| Salt: Lead time [0.1 sec] | lead time until the first addition of salt. The brushes are in position |
| Salt: Addition 1 [0.1 sec] | Duration of the first addition of salt |
| Salt: Lag 1 [0.1 sec] | lag |
| Salt: Addition 2 [0.1 sec] | Duration of the second salt addition |
| Salt: Lag 2 [0.1 sec] | lag 2 |
| Tank | Water extraction from tank 1, from tank 2 or from both tanks. The water is pumped from tank no. 1 until it is empty, then from tank no. 2
|
| Clean Side | The disc brushes are moved away after completion of the treatment process, the side brush remains in place. This way, cheese grease that spills over the edge can still be distributed. The duration can be set in ¼. With setting 4, the plate continues to rotate for another full cycle (option)
|
| Align Cheese | Square cheese can be moved back onto the board at 0°, 90° or 180° as desired. If the function is switched off, the cheese is returned at random.
|
| X-Axis Speed | X-axis speed can be reduced, so that the mechanics are protected and wear is minimized or slippery cheese does not move during fetching/returning. Reducing the speed reduces the treatment performance.
|
| Z-Axis Speed |
|
| Turner | The turner stops at 90° (top) and/or at 180° (bottom) for a certain time
|
| Lower Table | Activate when the cheese sticks. The table is moved slightly downwards during the process of pushing the cheese away.
|
| Rotate Cheese |
|
| Diameter [mm] | Enter the current diameter |
| Clamp Close |
|
| Clamp Current Limit [%] | Enter the current limit for stopping the clamp |
| Turning Centering |
|
Assign Treatment Parameters (optional)
The treatment parameters are linked to various conditions or rules. The most important condition is the age of the cheese.
These conditions then result in the treatment recommendations or the jobs are created that are generated with New Auto Job.
Note
Assign Treatment Parameters and Treatment Plans are mutually exclusive. Only one of the two types of job generation options can be active at any one time.
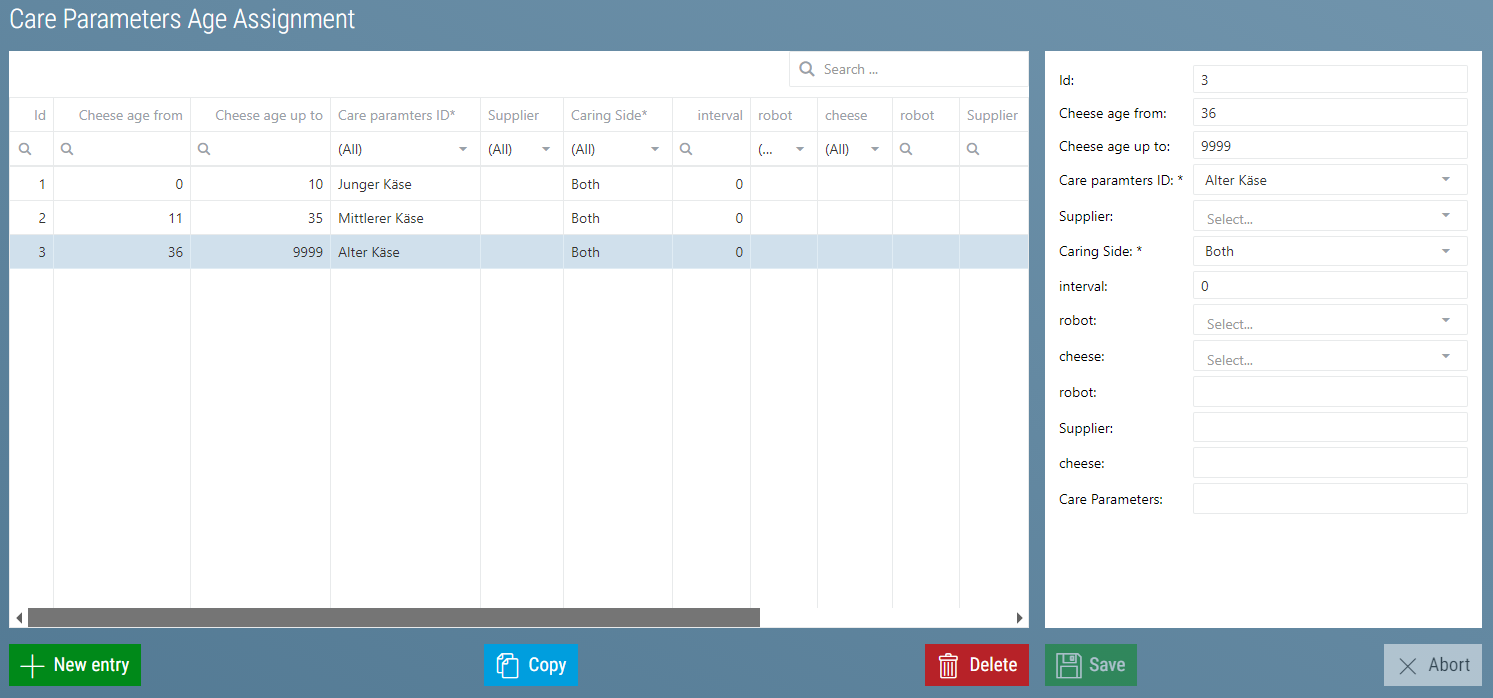
These are the conditions:
| Name | Description |
|---|---|
| Age of Cheese From - To | The cheese's age in days. This indicates how old the cheese must be for these treatment parameters to be used |
| Cheese (optional) | Here you can specify which type of cheese should be treated with this treatment program. This means that this program is always used for this type of cheese. If nothing is specified, this rule applies to all types of cheese. |
| Supplier (optional) | Here you can specify which supplier the cheese must come from in order to be treated with this treatment program. If nothing is specified, this rule applies to all suppliers |
| Robot (optional) | Here you can specify which robot should execute this program. This way a program can be defined for one robot and cannot be assigned to another by mistake. If nothing is specified, this rule applies to all robots. |
| Treatment Side (optional) | Here you can specify for which cheese side the treatment parameters should be used. This allows, for example, a little more water to be used on one side. There is one even and one uneven side. When the cheese is stored, it is always placed on the even side. Every time the cheese is returned by the robot in 'Remote' or 'Report Only' mode, the cheese is turned in the system. If nothing is specified, this rule applies to both sides. |
| Interval | This interval is used to determine when the cheeses to which this rule applies should be treated again. This is how the treatment recommendations are created. |
Important
It is important to ensure that there is no overlap in the rules. This applies in particular to the age condition.
Also take care that there is a rule for all cheeses!
Tip
To ensure that a rule is in place for all cheeses, you can first create rules for all required cheese age groups (e.g.: young, medium, old) that have no further conditions apart from the age restriction.
Treatment Plans (optional)
A treatment plan defines the sequence of treatment processes for a batch.
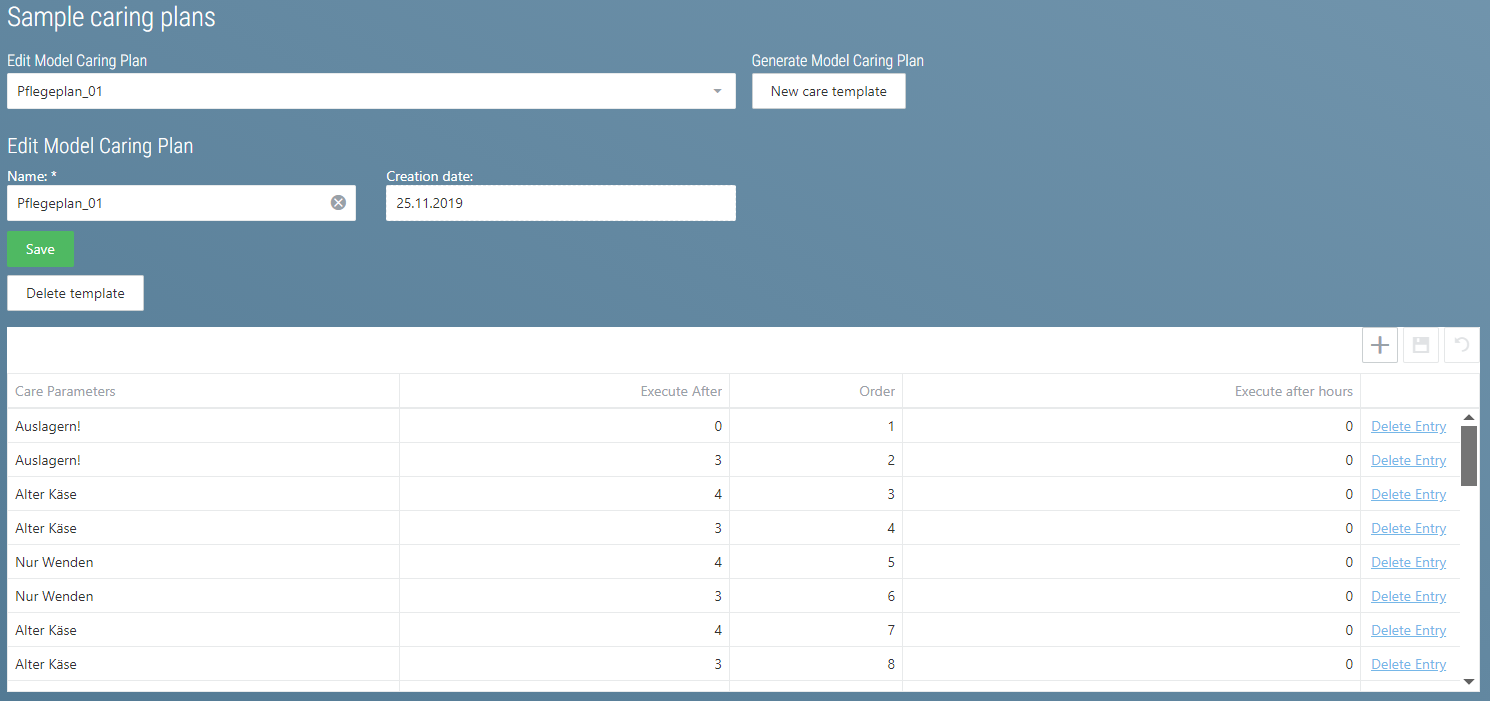
Sample Treatment Plans (optional)
To avoid having to create a new treatment plan for each batch, there are so-called sample treatment plans.
To create a new sample treatment plan, click on New Sample Plan  .
.
A new sample treatment plan is created. Initially, it will be named after the current date To rename the plan you can simply enter a new name and click on Save.
This is how you can also rename a sample treatment plan.
To rename the plan you can simply enter a new name and click on Save.
This is how you can also rename a sample treatment plan. 
To create the treatment plans, you must now insert the individual entries in the table below. To insert a new entry, click on the plus sign.
Then fill in the following columns:
| Column Name | Description |
|---|---|
| Treatment Parameter | Here you must select the treatment parameter to be used for this treatment process. |
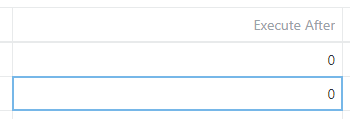
| Execute After | This is where you enter how many days after the last treatment the new treatment should be carried out. For the first entry, the storage date is used to make the calculation |
| Execute After Hours | Like Execute After but in hours. If something is entered here, this value is the one that will be used. If nothing or 0 is entered here, only 'Execute After' will be used. |
| Order | A figure is entered here. The treatment plan entries are sorted and processed according to this figure. |
After creating an entry, use the disk icon 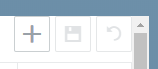 to save.
Tip
Several entries can be created at the same time which can then all be saved together
To edit a sample treatment plan, simply click on the values to be edited. A blue frame appears and you can change the value.
If you have changed the value and leave the input field, the frame turns green on all sides.
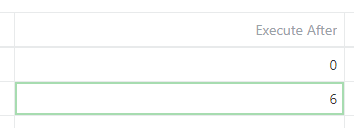
Now you can save the change by clicking on the disk icon. If you don't want the changes after all, you can cancel them with the left arrow icon.
Tip
Several entries can be edited simultaneously.
Treatment Plans(optional)
Each batch is assigned a treatment plan when it is put into storage. To do this, the sample treatment plan selected during putaway is copied.
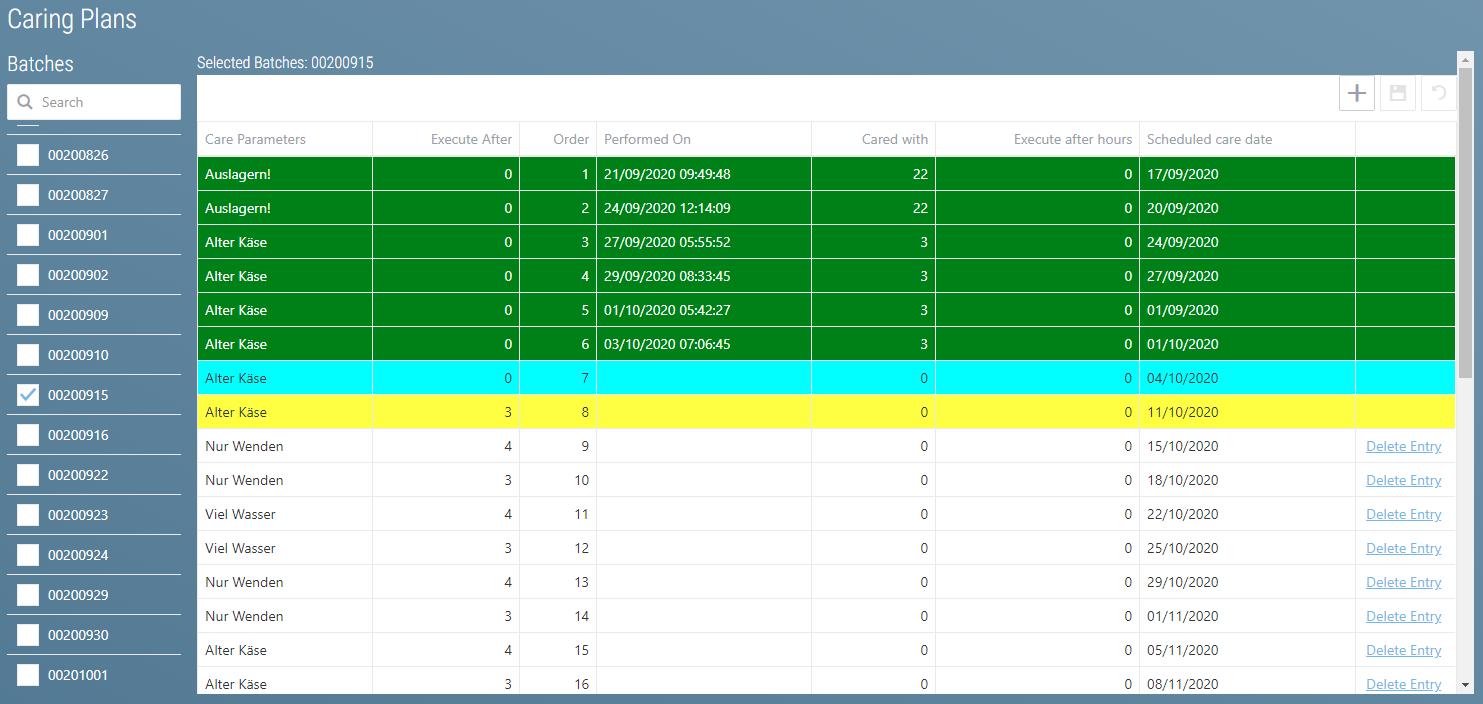
All treatment plans for these batches can be looked up in this view.
The following columns are displayed here:
| Column Names | Description |
|---|---|
| Treatment Parameter | Which treatment parameter is used to plan the treatment process |
| Execute After | How many days after the last treatment the treatment process is carried out. Only used if Execute After Hours contains nothing or 0. |
| Execute After Hours | Like Execute After but in hours. If something is entered here, this value is the one that will be used. |
| Order | The order of treatment processes |
| Performed On | When the treatment process was performed |
| Treated With | Which treatment parameter was used to perform the treatment |
| Planned Date of Treatment | When the treatment would be due, if nothing is changed. This is calculated at putaway. |
This view allows searching for batches. All other batches that do not match the search filter will subsequently be hidden.
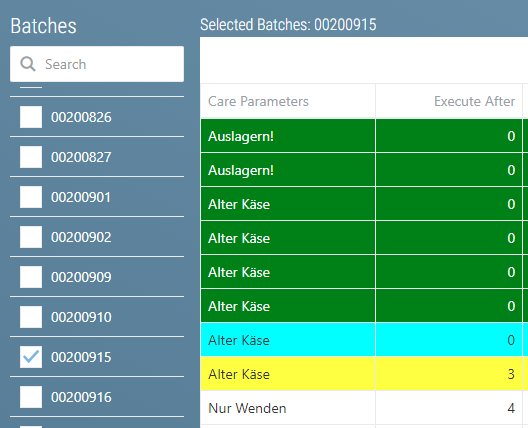
The selected batches are also displayed above the table.
If a batch has been selected, the system will display the status of the treatment plan for the batch and it will be possible to process treatment plan entries which have not yet been processed. The procedure is the same as when editing sample treatment plans.
The color of the treatment plan entries reflects the status:
- Yellow: A robot has this treatment process in its order list
- Turquoise: This treatment process is currently being carried out
- Green: This treatment process has already been carried out
- White: This treatment process has not yet gotten underway.
Tip
Several batches can be selected simultaneously. To do this, the desired batches must be selected and the treatment plan must be adjusted. The treatment plans of all selected batches are then compared when saved.