Configure the physical behavior
In the previous chapter we made some basic preparations to the imported model like
- grouping 3d-objects into kinematic groups
- changing the color of 3d-objects
- adding a floor to the model
Now we want to add some physical behavior to the model which we will need to simulate the handling of material. We want the robot to pick a box at position A and stack them on position B. To achieve this, we need to tell the simulation which objects are static and which ones are dynamic.
Make the floor static
In the first step we want to make the floor static. A static 3d-object is fixed in the simulation and can not change it's position. When the floor is selected either in the 3D View window or the Assembly Structure window, we can see the properties of the selected 3d-object in the Selected 3D Object window, which is located in the bottom left corner by default.
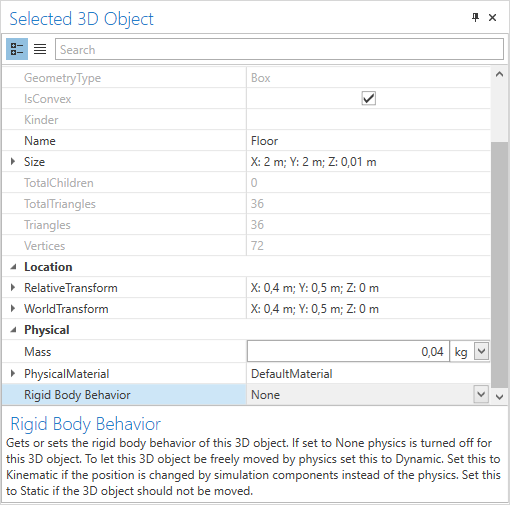
You can now change the Rigid Body Behavior property to Static.
Note
A change of the rigid body bahavior of an 3d-object, is applied immediately. Nevertheless it can take a few seconds if the geometry is very complex. This is because complex geometries have to be simplified for the real-time simulation.
Make the gripper kinematic
On the bottom of the z-axis of the portal robot we can see a vacuum gripper. We want to use this gripper to pick the boxes. Therefore we need to tell the simulation that this 3d-object can interact with other 3d-objects. Since the gripper should move in relation to the kinematic chain, we set the Rigid Body Behavior to Kinematic.
Note
A rigid body behavior of type kinematic means, that the 3d-object is not moved when external forces are applied. External forces are applied when, for example, an other 3d-object collides with the 3d-object. Kinematic objects can only be moved by applying a speed or position. This can be achieved by using simulation components. We will learn how to do this in the next chapter.
Next
In the next chapter you will bring the model to live by adding actors and sensors.